

Walking into a freshly painted room that smells of lacquer and looks like a glass sheet is a feeling every DIY enthusiast chases. But achieving that flawless, factory-like finish is rarely about the paint itself—it’s about the tool in your hand and the technique behind it. If you are tired of brush strokes, roller stipple, and uneven orange peel textures, the HVLP Paint Sprayer is your ticket to a professional-grade outcome. High Volume, Low Pressure technology atomizes paint into a fine mist, allowing for incredible control and a smooth, even coat that brushes simply cannot replicate.
However, owning an HVLP Paint Sprayer does not automatically make you a professional. The machine is only as good as the operator’s preparation and methodology. In this comprehensive guide, we’ll dive deep into the advanced tips, tricks, and pitfalls to avoid, ensuring your next project looks like it was done by a seasoned contractor.
1. The Golden Rule: Thin Your Paint (and Test It)
The most common mistake beginners make with an HVLP Paint Sprayer is using paint straight from the can. HVLP systems rely on gravity and air pressure to draw paint up a tube. High-viscosity materials (like thick latex or primer) will clog the nozzle, cause spitting, and produce a rough, sandy texture.
The Trick: Always check the manufacturer’s recommendation for thinning. As a rule of thumb, you want the paint to have the consistency of heavy cream. Use a viscosity cup (a simple flow cup) to test this: fill the cup with paint and time how long it takes to empty. Most HVLP machines call for a 20–30 second drain time. Stir the paint slowly to avoid creating air bubbles—air bubbles are the enemy of a smooth finish.
2. Material Matters: Strain Everything
Even if your paint looks smooth, dried skin, dust, or clumps can hide in the bucket. Running unstrained paint through an HVLP Paint Sprayer is akin to pouring sand into a sports car engine. These particles will block the fluid nozzle tip, causing intermittent spitting that ruins your flawless surface.
The Trick: Invest in a pack of disposable paint strainers (nylon mesh) and funnel every single batch of paint through them. This 60-second step will save you hours of disassembly, cleaning, and re-sanding.
3. The “Dry Pass” and the Perfect Distance
The distance between the spray gun nozzle and the surface dictates the entire look of the finish. If you hold the gun too close, you’ll create drips and a heavy, “fat” coat. If you hold it too far away, the solvents will evaporate before hitting the surface, leaving a dry, dusty “velvet” texture known as overspray.
The Trick: Maintain a consistent 6–8 inches from the surface. More importantly, do not arc your wrist. Keep the gun perpendicular to the project at all times, moving your entire arm and shoulder, not just your wrist. A sweeping arc deposits more paint in the center and less on the edges, creating a tiger-stripe effect.
The “Dry Pass”: Before you lay down the first coat of paint, do a quick dry pass. Point the gun at a piece of cardboard and pull the trigger, observing the spray pattern. Adjust the nozzle to achieve an even, oval-shaped fan without any heavy “fingering” (spitting at the edges). Once that mirror-like pattern is set, you are ready for the real work.
4. Mastering the Overlap and the “Wayward Mist”
A professional finish is entirely about consistent film build. If you spray in straight lines without overlap, you will see alternating stripes of high-gloss and dull paint.
The Trick: Overlap each pass by 50%. As you move side to side, the center of your fan should align with the edge of the previous pass. This ensures an even distribution.
The Flaw: Lifting your finger off the trigger at the end of each pass causes a heavy buildup of paint at that exact stopping point. To fix this, “trigger late, release early” —begin pulling the trigger just before the gun reaches the edge of the project and release the trigger just after you pass the edge. This “wayward mist” allows the beginning and end of the spray to land off-board, leaving the actual edges clean and even.
5. Viscosity and Pressure Tuning
While thinning is critical, controlling the air pressure is equally vital. With an HVLP Paint Sprayer, you are aiming for a balance: enough air to atomize the paint into tiny droplets, but not so much that you blow the paint around the room or create excessive fog.
The Trick: Start with the air pressure dial set to its lowest setting. Increase it gradually until you see the spray pattern break up into a fine, pulverized mist at the nozzle. If you see “starving” (sputtering), you need higher pressure or a thinner material. If you see huge blobs of paint, the pressure is too low or the material is too thick. Always test on scrap wood first—never on the project itself.
6. The Pre-Spray Wipe-Down and Tack Cloth
Professional painters know that 90% of a great paint job is in the prep. An HVLP Paint Sprayer will not cover up sanding scratches; in fact, it magnifies them. Sanding dust is your biggest enemy.
The Trick: After sanding the surface (starting at 120-grit and moving to 220-grit), do not just blow it off with air. Vacuum the surface, then wipe it down with a chemical degreaser (like denatured alcohol) to remove any oils from your fingerprints. Finally, run a lint-free tack cloth over the surface. This feels obsessive, but it is the difference between a “dusty” finish and a “glass” finish.
7. Environmental Control: Temperature and Humidity
You cannot spray water-based paints in 90°F humidity, nor can you spray solvent-based lacquers in freezing temperatures. The drying time is directly linked to the weather.
The Trick: The ideal environment for spraying is between 65°F and 75°F with relative humidity below 50%. If you are spraying indoors, keep the room well-ventilated but free of drafts. Use a space heater to warm the room before you spray, not during. Never use a fan blowing directly on the project, as it will push the mist away from the surface, resulting in a dry, “orange peel” texture.
8. Cleaning: The Non-Negotiable Ritual
Here is the hard truth: a dirty HVLP Paint Sprayer is a broken HVLP Paint Sprayer. If you leave latex paint to dry in the tiny fluid passages, the sprayer will never atomize correctly again. It will spit, clog, and ruin your day.
The Trick: When you finish spraying, immediately dump out the remaining paint. Fill the cup with your solvent (water for latex, mineral spirits for oil-based). Run the solvent through the gun until it runs clear. Do not stop there. Remove the fluid nozzle, the air cap, and the needle. Soak these in solvent for 10 minutes. Use a brush to cleanse the small ports thoroughly. Lubricate the needle with a light machine oil before reinstalling. This 20-minute ritual will keep your tool functioning like new for years.
9. Strain the Final Coat for Furniture Finishing
If you are spraying clear coats like polyurethane or lacquer, do not skip the final filter. Wood dust and bubbles from vigorous stirring create micro-defects. Use a 200-micron mesh filter and let the clear coat sit for 10 minutes after stirring to allow trapped bubbles to rise to the surface before you pour it into the cup.
10. Patience with Coat Times
A professional doesn’t spray on thick layers; they spray multiple thin coats. Drying times matter more with an HVLP gun because the low pressure means the volatile solvents escape quickly. For latex paints, wait 30–60 minutes between coats. For solvent-based paints, wait 2–4 hours. Rushing to recoat too soon will cause the new layer to “bite” into the old one, causing a solvent pop (crater formation) or a saggy, rubbery film.
Why Choose the Tilswall HVLP Paint Sprayer?
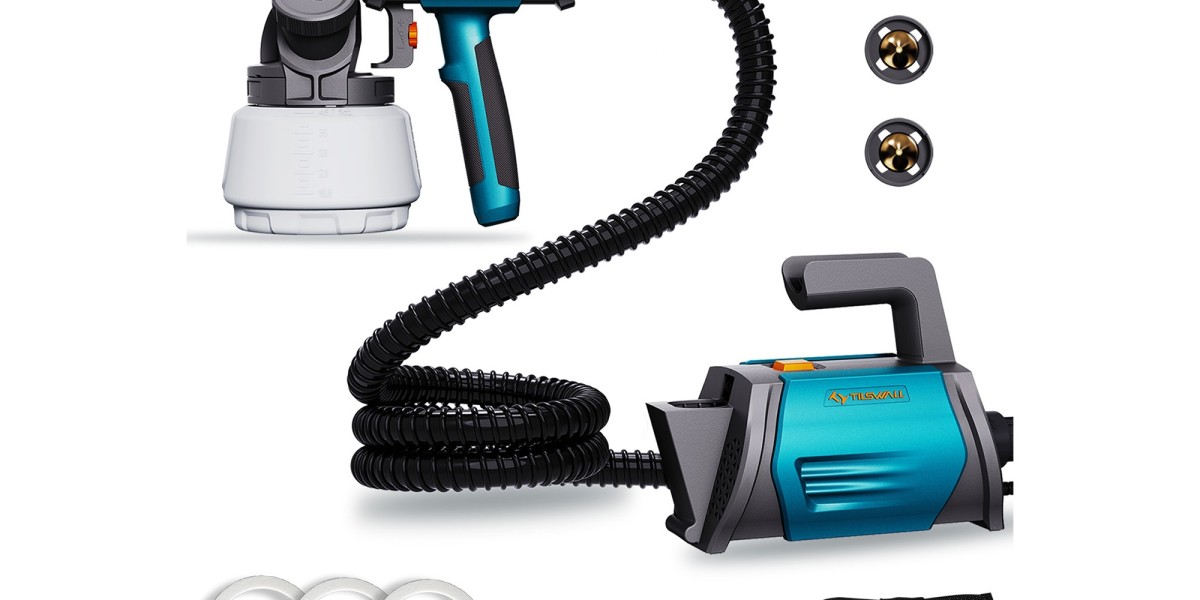
So, you have absorbed all these tips—but a craftsman is only as good as his tools. You need a machine that provides the precise control we’ve discussed without breaking the bank or weighing you down. This is where the Tilswall HVLP Paint Sprayer steps into the spotlight.
The Tilswall is engineered specifically for the discerning DIYer and semi-professional user who demands high-end results. Here is why it is the perfect companion for the tricks mentioned above:
- Precision Control Knobs: The Tilswall features dedicated, independent dials for air volume and paint flow. This allows you to fine-tune the atomization exactly as we discussed—easily adjusting from a fine mist for stain to a heavier flow for primer. Its advanced air cap design ensures a uniform spray pattern with minimal overspray.
- High-Quality Brass Nozzle Set: The Tilswall is equipped with a brass nozzle and needle assembly that resists corrosion from water-based paints. This longevity means your investment pays off for years, and the precision machining ensures that the spray pattern remains symmetrical pass after pass.
- Effortless Cleaning: One of the biggest pains with cheaper sprayers is disassembly, but the Tilswall is designed with tool-free disassembly in mind. You can quickly remove the aluminum cup and nozzle for deep cleaning—making the “Cleaning Ritual” we mentioned above a 10-minute breeze rather than a 45-minute frustration.
- Versatile Applications: Whether you are spraying chalk paint on furniture, latex on walls, or varnish on trim, the Tilswall handles varying viscosities with ease. Its powerful motor and adjustable settings allow you to move from a 60-second viscosity exterior latex down to a 30-second thin wood sealer without constant clogging.
Final Thoughts
Mastering an HVLP Paint Sprayer is a journey of technique over mere power. It is about respecting the material, controlling your environment, and being methodical with your movements. Take the time to practice on cardboard, adhere to the thinning rules, and never skip the cleanup. When you pair these professional habits with a reliable, well-engineered piece of equipment like the Tilswall HVLP Paint Sprayer, you transform from a painter into a finisher.
Whether you are refinishing a family heirloom, updating your kitchen cabinets, or spraying a perfect two-tone paint job on your car, the Tilswall provides the consistency and power you need to achieve that “wow” factor. Stop wrestling with brushes and rollers—grab a Tilswall HVLP Paint Sprayer, apply these tips, and watch your craft elevate to a professional standard.