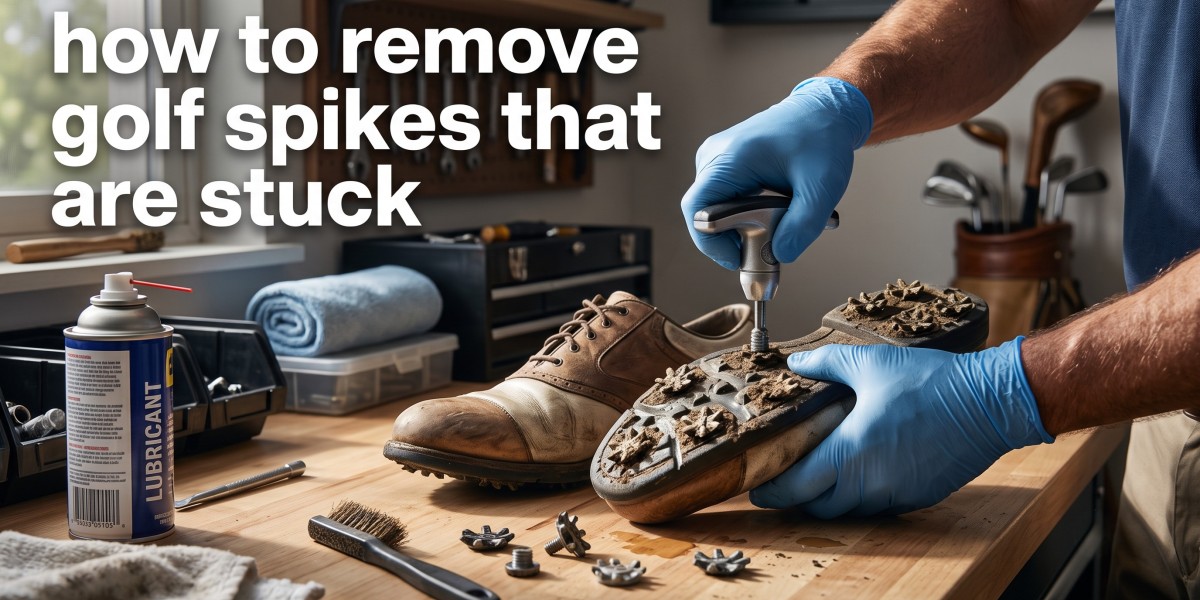


How to Remove Golf Spikes That Are Stuck: The Ultimate Guide to Restoring Your Shoes
There is nothing quite as frustrating for a golfer as preparing for a weekend round only to realize your traction is gone, and one or more of your cleats simply will not budge. Whether you are a seasoned professional or a weekend warrior, learning how to remove golf spikes that are stuck is a critical maintenance skill. When spikes become lodged due to accumulated dried mud, sand, or rust, they can feel like they are permanently fused to the sole of your shoe. This guide is designed to take you through the entire process, from basic cleaning techniques to advanced mechanical extraction methods. By the end of this article, you will have the knowledge and confidence to handle even the most stubborn cleats without damaging your expensive footwear. We will explore the tools you need, the chemistry of loosening debris, and the preventative measures that ensure you never face this headache again.
Understanding Why Golf Spikes Get Stuck in the First Place
Before we dive into the "how-to," it is important to understand the "why." Golf shoes live in a harsh environment. They are constantly exposed to moisture, fertilizers, grass clippings, and fine sand. These elements work their way into the tiny threads of the spike receptacle.
Over time, this mixture hardens, acting like a natural cement. Furthermore, if you haven’t changed your spikes in a long season, the plastic or metal threads can undergo a process of "cold welding" or simply become brittle and jam. Maintaining a premium pair of footwear is an essential skill for any golfer who values performance and style. If you ignore the buildup, the friction required to break that seal becomes greater than the strength of the plastic spike itself, leading to stripped holes and the dreaded stuck cleat.
The Essential Toolkit for Stuck Golf Spikes
You cannot win a battle without the right equipment. To learn how to remove golf spikes that are stuck, you should gather a few specific items before you begin.
Standard Spike Wrench: Preferably a "two-pin" or "cleat ripper" style with a large handle for better torque.
Needle-Nose Pliers: Essential for gripping the edges of a spike when the wrench holes are stripped.
WD-40 or Penetrating Oil: To break down rust and lubricate the threads.
Old Toothbrush or Wire Brush: To clear away surface debris.
Warm Water and Dish Soap: For the initial soak.
Vice-Grips: For extreme cases where you need maximum clamping force.
Small Flathead Screwdriver: To dig out packed dirt from the wrench holes.
Step 1: The Pre-Removal Cleaning Process
The biggest mistake beginners make is trying to force a stuck spike while the shoe is still covered in dry mud. You must clear the battlefield first. Use a stiff brush or an old toothbrush to scrub around the base of the spike.
If the wrench holes are filled with dirt, use a small screwdriver or a tee to pick the debris out. If the wrench cannot sit flush and deep into the spike, you will almost certainly strip the plastic, making the job much harder. A clean spike is significantly easier to manipulate than one buried under a layer of dried fairway turf.
Step 2: The Deep Soak Method
If the spike doesn't budge with a standard wrench after cleaning, it's time for a soak. This is the most "human-like" and gentle way to approach the problem. Fill a shallow tray with about half an inch of warm water mixed with a generous amount of grease-cutting dish soap.
Place your golf shoes in the tray so that only the spikes and the very bottom of the sole are submerged. Do not submerge the leather uppers. Let them soak for 20 to 30 minutes. This helps rehydrate the "cement" of mud and grass trapped in the threads. Often, after a good soak, a stubborn spike will turn with minimal effort.
Step 3: How to Remove Golf Spikes That Are Stuck Using Penetrating Oil
When water isn't enough, chemistry is your best friend. Penetrating oils like WD-40 or PB Blaster are designed to seep into microscopic gaps and break the bond of rust and grime.
Dry the sole of the shoe completely after the soak.
Spray a small amount of penetrating oil directly onto the base of the stuck spike.
Let it sit for at least 15 minutes. For extremely stubborn spikes, let it sit overnight.
The oil will travel down the threads, providing the lubrication necessary to break the friction.
Attempt to turn the spike again with your wrench.
Step 4: Using Pliers for Stripped Spikes
If you have already tried the wrench and the holes in the spike have stripped out, don't panic. This is a common scenario when learning how to remove golf spikes that are stuck.
Grab your needle-nose pliers or, even better, a pair of Vice-Grips. Lock the pliers onto the side of the spike as tightly as possible. Ensure you are gripping the hard plastic part of the spike, not just the soft rubber traction elements. Twist counter-clockwise with a steady, firm pressure. Avoid jerky movements, as these are more likely to cause the pliers to slip and further damage the spike or your hand.
Step 5: The Heat Expansion Technique (Beginner Caution)
Heat causes materials to expand at different rates, which can often break a mechanical bond. However, you must be extremely careful not to melt the sole of your shoe.
Use a hairdryer on a high setting and point it at the stuck spike for about 30 to 45 seconds. The goal is to get the spike and the receptacle warm, not hot to the touch. Once the plastic has slightly expanded and softened any remaining debris, immediately try to use your wrench or pliers to twist it out. This method is often the "secret weapon" for professionals in pro shops.
Advanced Methods: The Last Resort Drill Technique
If you are a professional or a very handy beginner and the spike is absolutely fused, you may need to use a drill. This is a "last resort" because of the risk of damaging the internal threading of the shoe.
Step | Action | Tool Needed |
|---|---|---|
1 | Drill two small pilot holes into the face of the spike. | Power Drill (Small bit) |
2 | Insert the tips of a needle-nose plier into the holes. | Needle-nose Pliers |
3 | Use the pliers as a makeshift wrench to gain torque. | Pliers |
4 | If that fails, carefully drill through the center of the spike. | Power Drill (Medium bit) |
When drilling the center, the goal is to weaken the structure of the spike until it collapses inward, allowing you to pull the pieces out with pliers. Be incredibly careful not to drill deep enough to hit the shoe's midsole or your foot's footbed.
Cleaning the Receptacle for New Spikes
Once you have successfully learned how to remove golf spikes that are stuck and have cleared the old cleat, your job isn't done. You must prepare the "home" for the new spike.
Use a wire brush or a Q-tip dipped in rubbing alcohol to clean the internal threads of the receptacle. If you leave old grit in there, the new spike will not seat correctly and is likely to get stuck even faster next time. Ensure the area is dry and free of any leftover penetrating oil before inserting the replacement.
Tips to Prevent Golf Spikes from Getting Stuck Again
Prevention is always better than a difficult cure. To avoid having to deal with stuck spikes in the future, follow these professional maintenance tips:
Use Anti-Seize Lubricant: Apply a tiny dab of marine-grade anti-seize or even a bit of Vaseline to the threads of the new spikes before installing them.
Don't Overtighten: Tighten until you hear the "click" (if using a torque wrench) or until they are snug. Over-cranking them makes removal nearly impossible.
Regular Cleaning: After every round, use a brush to remove mud and grass from around the spikes.
Quarterly Replacement: Even if the traction looks okay, consider loosening and re-seating your spikes every 3 months to prevent them from "setting" into the sole.
Common Mistakes to Avoid
When golfers are desperate, they often make mistakes that ruin their shoes. Avoid these pitfalls:
Using a Hammer: Never try to "knock" a spike loose. This can crack the sole or damage the internal receptacle.
Boiling Water: While a warm soak is good, boiling water can delaminate the glue that holds your shoe together.
Wrong Wrench: Using a generic wrench that doesn't fit your specific brand of spikes (Fast Twist, Slim-Lok, etc.) will almost always strip the spike.
Why Quality Replacement Spikes Matter
Not all spikes are created equal. When replacing the ones you just fought to remove, choose high-quality brands like Softspikes or Champ. These brands often use superior polymers that are less likely to become brittle or strip during removal. Matching the correct attachment system (e.g., Pins, Tri-LOK) is also vital for a secure fit that won't jam.
Troubleshooting Different Attachment Systems
Different shoes use different locking mechanisms.
Threaded (Metal): These are the most prone to rust. Use lots of penetrating oil.
Fast Twist/Tri-LOK: These use a "turn and click" system. If stuck, they usually require the "Deep Soak" method to clear the locking channels.
PINS System: Common in Adidas shoes, these have a very low profile and often require the needle-nose pliers method if they get worn down too far.
Frequently Asked Questions (FAQ)
1. Can I use WD-40 on my leather golf shoes?
You should avoid getting WD-40 on the leather uppers as it can stain or degrade certain finishes. However, using it carefully on the plastic or rubber sole to loosen a spike is perfectly safe as long as you wipe away the excess.
2. How often should I change my golf spikes?
For the average golfer playing once a week, you should change your spikes every 15–20 rounds. If you walk on pavement frequently, they will wear down faster and should be checked more often.
3. What if the internal receptacle in the shoe is broken?
If the metal or plastic piece inside the shoe that holds the spike is cracked or stripped, the shoe is unfortunately usually beyond repair. You might be able to glue a spike in as a temporary fix, but the structural integrity is compromised.
4. Is it okay to play with a missing spike?
It is not recommended. Playing with a missing spike puts uneven pressure on your feet and can lead to slipping during your swing, which might cause injury or a very bad slice!
5. Why did my spike wrench snap?
Standard plastic wrenches included with spike packs are often not strong enough for stuck spikes. If yours snaps, upgrade to a professional-grade steel "cleat ripper" wrench.
Conclusion
Learning how to remove golf spikes that are stuck is a rite of passage for any dedicated golfer. While it can be a tedious and messy process, following the steps of cleaning, soaking, lubricating, and using the right mechanical leverage will save you the cost of buying new shoes prematurely. Remember that patience is your most valuable tool; forcing a spike usually leads to a stripped head and more work. By maintaining a regular cleaning schedule and using a bit of lubricant during installation, you can ensure your next spike change is a breeze.
Now that your shoes are back in top shape and ready for the greens, why not check your other gear? Keeping your equipment maintained is the first step toward a lower handicap. Grab your toolkit, get those old spikes out, and get back to enjoying the game!